8. 对话框
对话框是图形用户界面中的有用组件,可让您与用户进行交流(因此得名“对话框”)。它们通常用于文件打开/保存、设置、首选项或应用程序主用户界面中无法容纳的功能。它们是小型模态(或阻塞)窗口,会始终显示在主应用程序窗口前,直到被关闭。Qt实际上为最常见的使用场景提供了多种“特殊”对话框,使您能够提供平台原生的用户体验,从而提升用户体验。
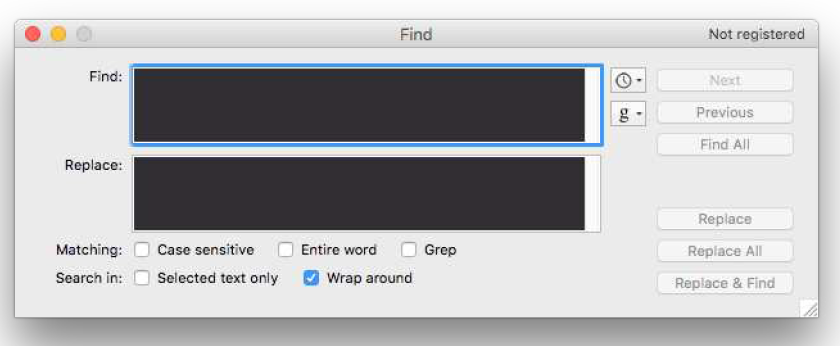
图四十九:标准图形用户界面功能——搜索对话框
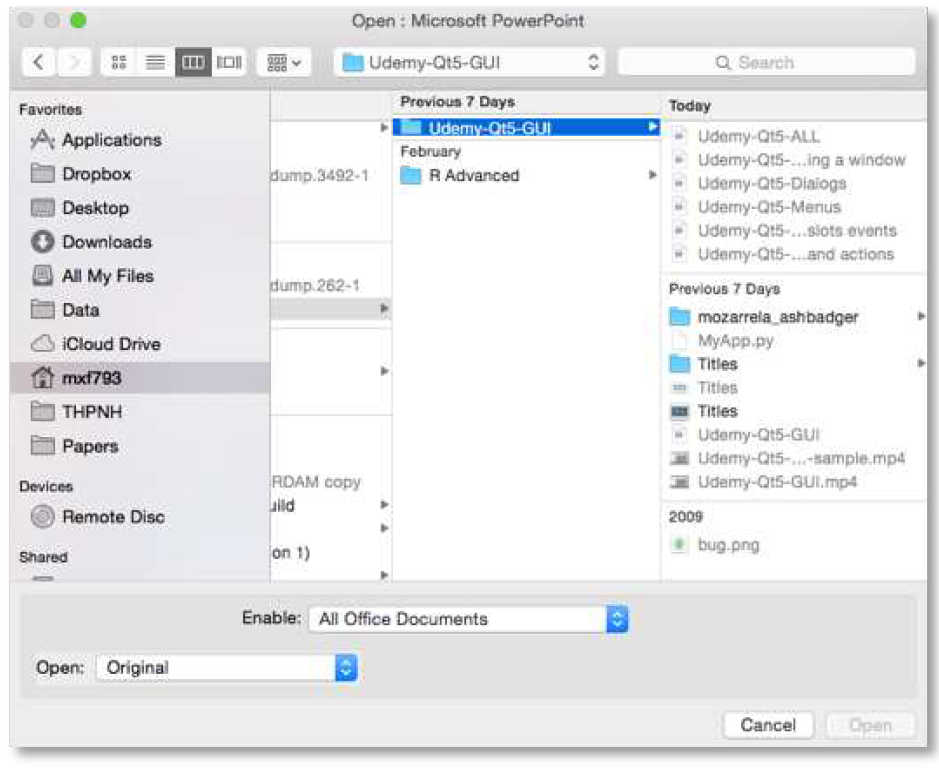
图五十:标准图形用户界面功能——文件打开对话框
在 Qt 中,对话框由 QDialog 类处理。要创建一个新的对话框只需创建一个 QDialog 类型的对象,并将其父控件(例如QMainWindow)作为其父对象传递给该对象即可。
让我们创建自己的 QDialog。首先,我们从一个简单的框架应用程序开始,该应用程序有一个按钮,该按钮与槽方法相连。
Listing 46. basic/dialogs_start.py
import sys

from PyQt6.QtWidgets import QApplication, QMainWindow, QPushButton

class MainWindow(QMainWindow):
    def __init__(self):
        super().__init__()

        self.setWindowTitle("My App")

        button = QPushButton("Press me for a dialog!")
        button.clicked.connect(self.button_clicked)
        self.setCentralWidget(button)

    def button_clicked(self, s):
        print("click", s)


app = QApplication(sys.argv)

window = MainWindow()
window.show()

app.exec()
在槽 button_clicked(接收按钮按下的信号)中,我们创建对话框实例,并将我们的 QMainWindow 实例作为父窗口传递。这将使对话框成为 QMainWindow 的模态窗口。这意味着对话框将完全阻止与父窗口的交互。
Listing 47. basic/dialogs_1.py
import sys

from PyQt6.QtWidgets import (
    QApplication,
    QDialog,
    QMainWindow,
    QPushButton,
)

class MainWindow(QMainWindow):
    def __init__(self):
        super().__init__()

        self.setWindowTitle("My App")

        button = QPushButton("Press me for a dialog!")
        button.clicked.connect(self.button_clicked)
        self.setCentralWidget(button)

    def button_clicked(self, s):
        print("click", s)

        dlg = QDialog(self)
        dlg.setWindowTitle("?")
        dlg.exec()


app = QApplication(sys.argv)

window = MainWindow()
window.show()

app.exec()
🚀 运行它吧! 点击按钮后,您将看到一个空的对话框弹出。
一旦创建了对话框,我们使用 exec() 函数启动它——就像我们之前使用 QApplication 创建应用程序的主事件循环一样。这并非巧合:当您执行 QDialog 时,会为对话框专门创建一个全新的事件循环。

一个事件循环统领一切
还记得我提到过,任何时候只能有一个 Qt 事件循环在运行吗?我是认真的!
QDialog会完全阻塞你的应用程序执行。不要在启动对话框的同时,还期望应用程序的其他部分继续运行。我们稍后将探讨如何利用多线程技术来解决这一难题。
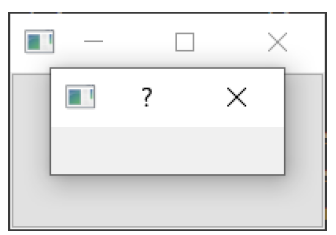
图五十一:我们的空对话框覆盖在窗口上。
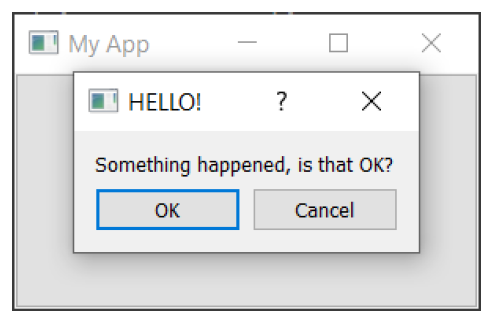
就像我们的第一个窗口一样,这个窗口也不太有趣。让我们通过添加一个对话框标题和一组“确定”和“取消”按钮来解决这个问题,以便用户可以接受或拒绝该模态窗口。
要自定义 QDialog,我们可以继承它。
Listing 48. basic/dialogs_2a.py
class CustomDialog(QDialog):
    def __init__(self):
        super().__init__()

        self.setWindowTitle("HELLO!")

        buttons = (
            QDialogButtonBox.StandardButton.Ok
            | QDialogButtonBox.StandardButton.Cancel
        )

        self.buttonBox = QDialogButtonBox(buttons)
        self.buttonBox.accepted.connect(self.accept)
        self.buttonBox.rejected.connect(self.reject)

        self.layout = QVBoxLayout()
        message = QLabel("Something happened, is that OK?")
        self.layout.addWidget(message)
        self.layout.addWidget(self.buttonBox)
        self.setLayout(self.layout)
在上述代码中,我们首先创建了 QDialog 的子类,并将其命名为 CustomDialog 。对于 QMainWindow,我们在类中的 __init__ 块中应用自定义设置,以便在对象创建时应用这些自定义设置。首先,我们使用 .setWindowTitle() 为 QDialog 设置标题,与我们为主窗口设置标题的方式完全相同。
下一段代码涉及创建和显示对话框按钮。这可能比您预期的要复杂一些。然而,这是由于Qt在不同平台上处理对话框按钮位置时具有灵活性。

轻松解决?
当然,您可以选择忽略这一点,使用布局中的标准
QButton,但本文所述的方法可确保对话框遵循主机桌面标准(例如“确定”按钮位于左侧而非右侧)。随意更改这些行为可能会让用户感到极其烦躁,因此我不建议这样做。
创建对话框按钮框的第一步是使用 QDialogButtonBox 的命名空间属性定义要显示的按钮。可用的按钮完整列表如下:
Table 1. QDialogButtonBox available button types.
| 按键类型 |
|---|
QDialogButtonBox.Ok |
QDialogButtonBox.Open |
QDialogButtonBox.Save |
QDialogButtonBox.Cancel |
QDialogButtonBox.Close |
QDialogButtonBox.Discard |
QDialogButtonBox.Apply |
QDialogButtonBox.Reset |
QDialogButtonBox.RestoreDefaults |
QDialogButtonBox.Help |
QDialogButtonBox.SaveAll |
QDialogButtonBox.Yes |
QDialogButtonBox.YesToAll |
QDialogButtonBox.No |
QDialogButtonBox.NoToAll |
QDialogButtonBox.Abort |
QDialogButtonBox.Retry |
QDialogButtonBox.Ignore |
QDialogButtonBox.NoButton |
这些应该足以创建任何你能想到的对话框。您可以通过使用管道符 (|) 将多个按钮进行或运算来构建多按钮行。Qt会根据平台标准自动处理按钮的顺序。例如,要显示“确定”和“取消”按钮,我们使用了:
buttons = QDialogButtonBox.Ok | QDialogButtonBox.Cancel变量按钮现在包含一个整数值,代表这两个按钮。接下来,我们必须创建一个 QDialogButtonBox 实例来容纳这些按钮。按钮的显示标志作为第一个参数传递。
为了使按钮产生效果,您必须将正确的 QDialogButtonBox 信号连接到对话框上的槽。在本例中,我们将 QDialogButtonBox 的 .accepted 和 .rejected 信号连接到 QDialog 子类的.accept() 和 .reject() 处理程序。
最后,为了使 QDialogButtonBox 出现在我们的对话框中,我们必须将其添加到对话框布局中。因此,对于主窗口,我们创建一个布局,并将我们的 QDialogButtonBox 添加到其中(QDialogButtonBox 是一个控件),然后将该布局设置到我们的对话框上。
最终,我们在 MainWindow.button_clicked 槽中启动 CustomDialog。
Listing 49. basic/dialogs_2a.py
    def button_clicked(self, s):
        print("click", s)

        dlg = CustomDialog()
        if dlg.exec():
            print("Success!")
        else:
            print("Cancel!")
🚀 运行它吧! 点击以启动对话框,您将看到一个包含按钮的对话框。
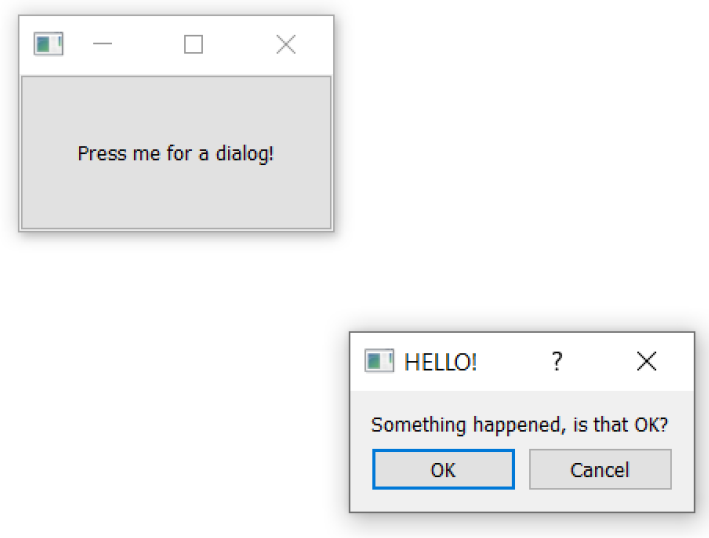
图五十二:我们与标签和按钮的对话框。
当您点击按钮以启动对话框时,可能会发现它出现在父窗口之外——通常位于屏幕中央。通常您希望对话框出现在其启动窗口之上,以便用户更容易找到。要实现这一点,我们需要为对话框指定一个父窗口。如果我们将主窗口作为父窗口传递给 Qt,Qt 会将新对话框的位置调整为对话框的中心与窗口的中心对齐。
我们可以修改我们的 CustomDialog 类,使其接受一个 parent 参数。
Listing 50. basic/dialogs_2b.py
class CustomDialog(QDialog):
    def __init__(self, parent=None): #1
        super().__init__(parent)

        self.setWindowTitle("HELLO!")

        buttons = (
            QDialogButtonBox.StandardButton.Ok
            | QDialogButtonBox.StandardButton.Cancel
        )

        self.buttonBox = QDialogButtonBox(buttons)
        self.buttonBox.accepted.connect(self.accept)
        self.buttonBox.rejected.connect(self.reject)

        self.layout = QVBoxLayout()
        message = QLabel("Something happened, is that OK?")
        self.layout.addWidget(message)
        self.layout.addWidget(self.buttonBox)
        self.setLayout(self.layout)
- 我们设置默认值为
None,这样我们就可以省略父对象。
然后,当我们创建自定义对话框的实例时,可以将主窗口作为参数传递进去。在我们的 button_clicked 方法中,self 就是我们的主窗口对象。
Listing 51. basic/dialogs_2b.py
    def button_clicked(self, s):
        print("click", s)

        dlg = CustomDialog(self)
        if dlg.exec():
            print("Success!")
        else:
            print("Cancel!")
🚀 运行它吧! 点击以启动对话框,您应该会在父窗口正中央看到对话框弹出。
图五十三:我们的对话框位于父窗口的中央。
恭喜!您已成功创建了第一个对话框。当然,您可以继续向对话框中添加任何其他内容。只需像往常一样将其插入到布局中即可。
大多数应用程序都需要一些常见的对话框。虽然您可以自行构建这些对话框,但Qt也提供了许多内置对话框供你使用。这些对话框为您处理了大量工作,设计合理且符合平台标准。
使用 QMessageBox 显示消息对话框
我们将首先介绍的内置对话框类型是 QMessageBox。它可用于创建信息、警告、关于或问题对话框——类似于我们手动创建的对话框。下面的示例创建了一个简单的 QMessageBox 并显示它。
Listing 52. basic/dialogs_3.py
    def button_clicked(self, s):
        dlg = QMessageBox(self)
        dlg.setWindowTitle("I have a question!")
        dlg.setText("This is a simple dialog")
        button = dlg.exec()

        # 查找按钮枚举项以获取结果。
        button = QMessageBox.StandardButton(button)

        if button == QMessageBox.StandardButton.Ok:
            print("OK!")
🚀 运行它吧! 您将看到一个带有“确定”按钮的简单对话框。
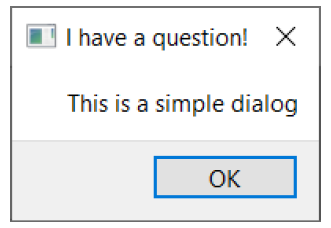
图五十四:一个
QMessageBox对话框。
与我们之前讨论的对话框按钮框类似, QMessageBox 上显示的按钮也通过一组常量进行配置,这些常量可以使用 | 符号组合以显示多个按钮。可用按钮类型的完整列表如下所示:
Table 2. QMessageBox available button types.
| 按键类型 |
|---|
QMessageBox.Ok |
QMessageBox.Open |
QMessageBox.Save |
QMessageBox.Cancel |
QMessageBox.Close |
QMessageBox.Discard |
QMessageBox.Apply |
QMessageBox.Reset |
QMessageBox.RestoreDefaults |
QMessageBox.Help |
QMessageBox.SaveAll |
QMessageBox.Yes |
QMessageBox.YesToAll |
QMessageBox.No |
QMessageBox.NoToAll |
QMessageBox.Abort |
QMessageBox.Retry |
QMessageBox.Ignore |
QMessageBox.NoButton |
您还可以通过设置以下其中一个图标来调整对话框中显示的图标:
Table 3. QMessageBox icon constants.
| 图标状态 | Description |
|---|---|
QMessageBox.NoIcon | 消息框没有图标 |
QMessageBox.Question | 这条消息是在提问 |
QMessageBox.Information | 该信息仅供参考 |
QMessageBox.Warning | 该消息为警告信息 |
QMessageBox.Critical | 该消息表明存在一个严重问题 |
例如,以下代码创建一个带有“是”和“否”按钮的对话框。
Listing 53. basic/dialogs_4.py
from PyQt6.QtWidgets import (
    QApplication,
    QDialog,
    QMainWindow,
    QMessageBox,
    QPushButton,
)

class MainWindow(QMainWindow):
    # __init__ 方法已省略,以提高可读性
    def button_clicked(self, s):
        dlg = QMessageBox(self)
        dlg.setWindowTitle("I have a question!")
        dlg.setText("This is a question dialog")
        dlg.setStandardButtons(
            QMessageBox.StandardButton.Yes
            | QMessageBox.StandardButton.No
        )
        dlg.setIcon(QMessageBox.Icon.Question)
        button = dlg.exec()

        # 查找按钮枚举项以获取结果
        button = QMessageBox.StandardButton(button)

        if button == QMessageBox.StandardButton.Yes:
            print("Yes!")
        else:
            print("No!")
🚀 运行它吧! 您将看到一个带有“是”和“否”按钮的对话框。
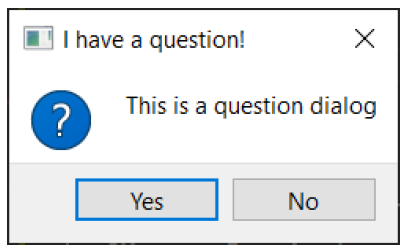
图五十五:使用
QMessageBox创建的对话框。
标准的 QMessageBox 对话框
为了进一步简化操作,QMessageBox 还提供了一系列静态方法,这些方法可用于直接显示此类消息对话框,而无需先创建 QMessageBox 实例。这些方法如下所示:
QMessageBox.about(parent, title, message)
QMessageBox.critical(parent, title, message)
QMessageBox.information(parent, title, message)
QMessageBox.question(parent, title, message)
QMessageBox.warning(parent, title, message)
parent 参数是对话框所属的父窗口。如果您是从主窗口启动对话框,可以使用 self 引用主窗口对象。以下示例创建一个问题对话框,与之前示例类似,包含“是”和“否”按钮。
Listing 54. basic/dialogs_5.py
    def button_clicked(self, s):
        button = QMessageBox.question(
            self, "Question dialog", "The longer message"
        )

        if button == QMessageBox.StandardButton.Yes:
            print("Yes!")
        else:
            print("No!")
🚀 运行它吧! 您会看到相同的结果,这次使用的是内置的
.question()方法。
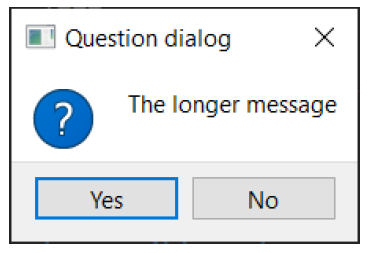
图五十六:内置的提问对话框
请注意,我们现在不再调用 exec() 函数,而是直接调用对话框方法,对话框便会被创建。每个方法的返回值都是被按下的按钮。我们可以通过将返回值与标准按钮常量进行比较,来检测被按下的按钮。
四个信息、问题、警告和关键方法也支持可选的按钮和默认按钮参数,这些参数可用于调整对话框中显示的按钮并默认选择其中一个。不过通常情况下,您可能并不希望更改默认设置。
Listing 55. basic/dialogs_6.py
    def button_clicked(self, s):
        button = QMessageBox.critical(
            self,
            "Oh dear!",
            "Something went very wrong.",
            buttons=QMessageBox.StandardButton.Discard
            | QMessageBox.StandardButton.NoToAll
            | QMessageBox.StandardButton.Ignore,
            defaultButton=QMessageBox.StandardButton.Discard,
        )

        if button == QMessageBox.StandardButton.Discard:
            print("Discard!")
        elif button == QMessageBox.StandardButton.NoToAll:
            print("No to all!")
        else:
            print("Ignore!")
🚀 运行它吧! 您将看到一个带有自定义按钮的确认对话框

图五十七:严重错误!这是一个糟糕的对话框。
请求单个值
有时您会需要从用户获取单个参数,并希望能够显示一个简单的输入对话框来获取该参数。对于此用例,PyQt6 提供了QInputDialog 类。该类可用于获取不同类型的数据,同时还可以对用户输入的值设置限制。
静态方法都接受一个父控件的父参数(通常为 self )、一个对话框窗口标题的标题参数以及一个显示在输入框旁边的标签,以及其他类型特定的控件。调用这些方法时,它们会显示一个对话框,关闭后返回一个值和 ok 的元组,告知您是否按下了“确定”按钮。如果 ok 为 False,则对话框已关闭。
首先,我们来看一个最简单的例子——一个按钮,它会弹出一个对话框,从用户那里获取一个整数值。它使用了 QDialog.get_int() 静态方法,传递了父级 self、窗口标题和输入控件旁边显示的提示信息。
Listing 56. basic/dialogs_input_1.py
import sys

from PyQt6.QtWidgets import (
    QApplication,
    QInputDialog,
    QMainWindow,
    QPushButton,
)


class MainWindow(QMainWindow):
    def __init__(self):
        super().__init__()

        self.setWindowTitle("My App")

        button1 = QPushButton("Integer")
        button1.clicked.connect(self.get_an_int)

        self.setCentralWidget(button1)

    def get_an_int(self):
        my_int_value, ok = QInputDialog.getInt(
            self, "Get an integer", "Enter a number"
        )
        print("Result:", ok, my_int_value)


app = QApplication(sys.argv)

window = MainWindow()
window.show()

app.exec()
🚀 运行它吧! 您将看到一个按钮。按下它后,系统会提示您输入一个数字。
到目前为止,一切都很令人兴奋。让我们扩展这个例子,添加一些按钮,以及它们的处理方法。我们将先将按钮的信号连接到方法槽,然后逐步实现每个输入方法。
Listing 57. basic/dialogs_input_2.py
import sys

from PyQt6.QtWidgets import (
    QApplication,
    QInputDialog,
    QLineEdit,
    QMainWindow,
    QPushButton,
    QVBoxLayout,
    QWidget,
)


class MainWindow(QMainWindow):
    def __init__(self):
        super().__init__()

        self.setWindowTitle("My App")

        layout = QVBoxLayout()

        button1 = QPushButton("Integer")
        button1.clicked.connect(self.get_an_int)
        layout.addWidget(button1)

        button2 = QPushButton("Float")
        button2.clicked.connect(self.get_a_float)
        layout.addWidget(button2)

        button3 = QPushButton("Select")
        button3.clicked.connect(self.get_a_str_from_a_list)
        layout.addWidget(button3)

        button4 = QPushButton("String")
        button4.clicked.connect(self.get_a_str)
        layout.addWidget(button4)

        button5 = QPushButton("Text")
        button5.clicked.connect(self.get_text)
        layout.addWidget(button5)

        container = QWidget()
        container.setLayout(layout)
        self.setCentralWidget(container)

    def get_an_int(self):
        my_int_value, ok = QInputDialog.getInt(
            self, "Get an integer", "Enter a number"
        )
        print("Result:", ok, my_int_value)

    def get_a_float(self):
        pass

    def get_a_str_from_a_list(self):
        pass

    def get_a_str(self):
        pass

    def get_text(self):
        pass


app = QApplication(sys.argv)

window = MainWindow()
window.show()

app.exec()
🚀 运行它吧! 您将看到一组按钮,可用于启动输入功能,但目前仅支持整数输入。
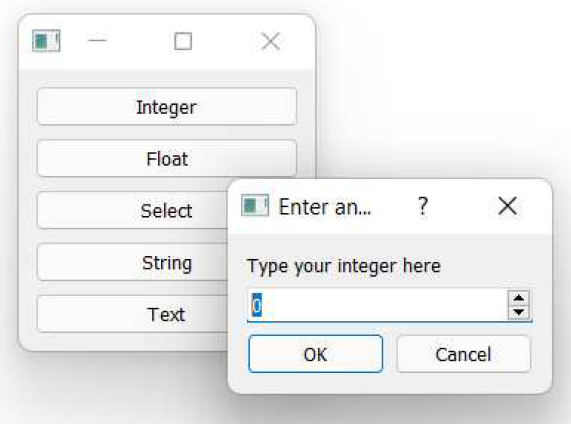
图五十八:对话框启动器演示。点击按钮以启动对话框并输入值。
按下按钮将调用我们定义的输入方法之一,让我们接下来实现它们。我们将依次遍历每个 QInputDialog 方法,查看可用的配置选项并将其添加到示例中。
整数
如前所述,要从用户获取整数值,可以使用 QInputDialog.getInt() 方法。该方法会在对话框中显示一个标准的 Qt QDoubleSpinBox 控件。您可以指定初始值、输入的最小值和最大值范围,以及使用箭头控件时的步长。
Listing 58. basic/dialogs_input_3.py
    def get_an_int(self):
        title = "Enter an integer"
        label = "Type your integer here"
        my_int_value, ok = QInputDialog.getInt(
            self, title, label, value=0, min=-5, max=5, step=1
        )
        print("Result:", ok, my_int_value)
图五十九:整数输入的对话框

即使用户点击“取消”按钮退出对话框,输入的值仍会被返回。在使用该值之前,您应始终先检查
ok返回参数的值。
浮点数
对于浮点数类型,您可以使用 QInputDialog.getDouble() 方法—— Python中的 float 类型对应着 C++ 中的 double 类型。这与上文的 getInt 输入完全相同,只是增加了 decimals 参数来控制显示的小数位数。
Listing 59. basic/dialogs_input_3.py
   def get_a_float(self):
       title = "Enter a float"
       label = "Type your float here"
       my_float_value, ok = QInputDialog.getDouble(
           self,
           title,
           label,
           value=0,
           min=-5.3,
           max=5.7,
           decimals=2,
       )
       print("Result:", ok, my_float_value)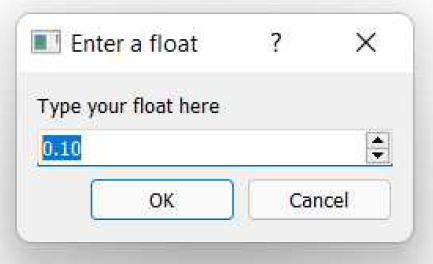
图六十:浮点数输入的对话框
从字符串列表中选择
要从字符串列表中选择一个项,可以使用 QInputDialog.getItem() 方法。要选择的字符串列表通过 items 参数提供。您可以通过将 current 参数设置为所选项的索引,来指定初始选中的项。默认情况下,该列表是可编辑的,即用户可以根据需要向列表中添加新项。您可以通过传递 editable=False 来禁用此行为。
Listing 60. basic/dialogs_input_3.py
    def get_a_str_from_a_list(self):
        title = "Select a string"
        label = "Select a fruit from the list"
        items = ["apple", "pear", "orange", "grape"]
        initial_selection = 2  # orange,从 0 开始索引
        my_selected_str, ok = QInputDialog.getItem(
            self,
            title,
            label,
            items,
            current=initial_selection,
            editable=False,
        )
        print("Result:", ok, my_selected_str)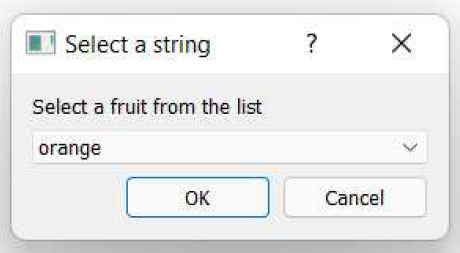
图六十一:从字符串列表中选择输入的对话框
单行文本
要从用户获取一行文本,您可以使用 QInputDialog.getText 。您可以通过将文本作为参数传递来提供输入的初始内容。模式参数允许您在正常模式和密码模式之间切换,其中输入的文本以星号显示,分别传递 QLineEdit.EchoMode.Normal 或 QLineEdit.EchoMode.Password。
Listing 61. basic/dialogs_input_3.py
    def get_a_str(self):
        title = "Enter a string"
        label = "Type your password"
        text = "my secret password"
        mode = QLineEdit.EchoMode.Password
        my_selected_str, ok = QInputDialog.getText(
            self, title, label, mode, text
        )
        print("Result:", ok, my_selected_str)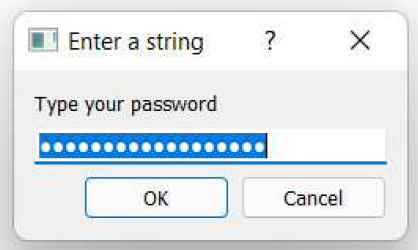
图六十二:单行文本输入对话框,密码模式。
多行文本
最后,要输入多行文本,您可以使用 QLineEdit.getMultiLineText() 方法。该方法仅接受文本的初始状态。
Listing 62. basic/dialogs_input_3.py
    def get_text(self):
        title = "Enter text"
        label = "Type your novel here"
        text = "Once upon a time..."
        my_selected_str, ok = QInputDialog.getMultiLineText(
            self, title, label, text
        )
        print("Result:", ok, my_selected_str)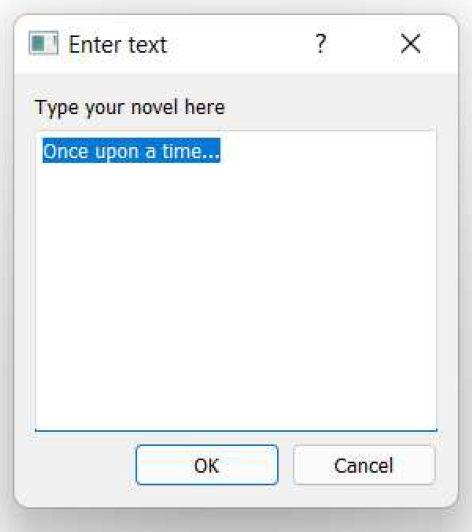
图六十三:多行文本输入的对话框
🚀 运行它吧! 在所有输入方法都已实现后,您现在可以点击每个按钮,查看不同的输入对话框出现。
使用 QInputDialog 实例
上述静态方法适用于大多数使用场景。然而,如果您希望对 QInputDialog 的行为进行更精细的控制,您可以创建一个 QInputDialog 的实例并在显示前对其进行配置——就像其他对话框类一样。以下是相同的示例,但采用这种方法。
Listing 63. basic/dialogs_input_instance.py
import sys

from PyQt6.QtWidgets import (
    QApplication,
    QInputDialog,
    QLineEdit,
    QMainWindow,
    QPushButton,
    QVBoxLayout,
    QWidget,
)


class MainWindow(QMainWindow):
    def __init__(self):
        super().__init__()

        self.setWindowTitle("My App")

        layout = QVBoxLayout()

        button1 = QPushButton("Integer")
        button1.clicked.connect(self.get_an_int)
        layout.addWidget(button1)

        button2 = QPushButton("Float")
        button2.clicked.connect(self.get_a_float)
        layout.addWidget(button2)

        button3 = QPushButton("Select")
        button3.clicked.connect(self.get_a_str_from_a_list)
        layout.addWidget(button3)

        button4 = QPushButton("String")
        button4.clicked.connect(self.get_a_str)
        layout.addWidget(button4)

        button5 = QPushButton("Text")
        button5.clicked.connect(self.get_text)
        layout.addWidget(button5)

        container = QWidget()
        container.setLayout(layout)
        self.setCentralWidget(container)

    def get_an_int(self):
        dialog = QInputDialog(self)
        dialog.setWindowTitle("Enter an integer")
        dialog.setLabelText("Type your integer here")
        dialog.setIntValue(0)
        dialog.setIntMinimum(-5)
        dialog.setIntMaximum(5)
        dialog.setIntStep(1)

        ok = dialog.exec()
        print("Result:", ok, dialog.intValue())

    def get_a_float(self):
        dialog = QInputDialog(self)
        dialog.setWindowTitle("Enter a float")
        dialog.setLabelText("Type your float here")
        dialog.setDoubleValue(0.1)
        dialog.setDoubleMinimum(-5.3)
        dialog.setDoubleMaximum(5.7)
        dialog.setDoubleStep(1.4)
        dialog.setDoubleDecimals(2)

        ok = dialog.exec()
        print("Result:", ok, dialog.doubleValue())

    def get_a_str_from_a_list(self):
        dialog = QInputDialog(self)
        dialog.setWindowTitle("Select a string")
        dialog.setLabelText("Select a fruit from the list")
        dialog.setComboBoxItems(["apple", "pear", "orange", "grape"])
        dialog.setComboBoxEditable(False)
        dialog.setTextValue("orange")

        ok = dialog.exec()
        print("Result:", ok, dialog.textValue())

    def get_a_str(self):
        dialog = QInputDialog(self)
        dialog.setWindowTitle("Enter a string")
        dialog.setLabelText("Type your password")
        dialog.setTextValue("my secret password")
        dialog.setTextEchoMode(QLineEdit.EchoMode.Password)

        ok = dialog.exec()
        print("Result:", ok, dialog.textValue())

    def get_text(self):
        dialog = QInputDialog(self)
        dialog.setWindowTitle("Enter text")
        dialog.setLabelText("Type your novel here")
        dialog.setTextValue("Once upon a time...")
        dialog.setOption(
            QInputDialog.InputDialogOption.UsePlainTextEditForTextInput,
            True,
        )

        ok = dialog.exec()
        print("Result:", ok, dialog.textValue())


app = QApplication(sys.argv)

window = MainWindow()
window.show()

app.exec()
🚀 运行它吧! 它应该像以前一样工作——请随意调整参数来调整它的行为!
有几点需要注意。首先,当您调用 exec() 时,返回值等同于之前返回的 ok 值(1 表示 True,0 表示 False)。要获取实际输入的值,您需要使用对话框对象的类型特定方法,例如 .doubleValue() 。其次,对于 QComboBox 从字符串列表中选择项时,您使用与行输入或文本输入相同的 .setTextValue()(设置)和 .textValue()(获取)方法。
文件对话框
应用程序中对话框最常见的用途之一是处理文件——无论是应用程序生成的文档,还是希望在应用程序使用之间保留的配置设置。幸运的是,PyQt6内置了用于打开文件、选择文件夹和保存文件的对话框。
如前所述,如果您使用 Qt 的内置对话框工具,您的应用程序将遵循平台标准。在文件对话框的情况下,PyQt6 更进一步,将使用平台的内置对话框进行这些操作,可以确保您的应用程序对用户来说是熟悉的。

创建良好的文件对话框非常困难,因此我不建议您尝试自行开发。
在 PyQt6 中,文件对话框是通过 QFileDialog 类创建的。为了方便起见,它提供了一系列静态方法,您可以调用这些方法来显示特定的对话框,而无需进行过多配置。以下是一个使用 QFileDialog.getOpenFileName() 静态方法获取要打开的文件名的示例。
Listing 64. basic/dialogs_file_1.py
import sys

from PyQt6.QtWidgets import (
    QApplication,
    QFileDialog,
    QMainWindow,
    QPushButton,
)


class MainWindow(QMainWindow):
    def __init__(self):
        super().__init__()

        self.setWindowTitle("My App")

        button1 = QPushButton("Open file")
        button1.clicked.connect(self.get_filename)

        self.setCentralWidget(button1)

    def get_filename(self):
        filename, selected_filter = QFileDialog.getOpenFileName(self)
        print("Result:", filename, selected_filter)


app = QApplication(sys.argv)

window = MainWindow()
window.show()

app.exec()
🚀 运行它吧! 点击按钮以打开文件选择对话框。选择一个文件并点击 [确定] 或 [取消] 按钮以查看返回的结果。
如您所见,QFileDialog.getOpenFilename() 方法会返回两个值。第一个值是所选文件的名称(如果对话框被取消,则为空字符串)。第二个值是当前活动的文件过滤器——用于过滤对话框中可见的文件。默认情况下,该过滤器为“所有文件 (*)”,所有文件均可见。
基于文件的对话框(打开和保存)都接受一个过滤器参数,该参数是一个用分号分隔的过滤器定义字符串列表——这有点奇怪!还有一个 initialFilter ,它是对话框首次打开时活动的过滤器字符串。让我们看看这些过滤器是如何定义的,以及如何最好地使用它们。
文件过滤器
Qt 文件过滤器的标准格式是一个字符串,其格式如下:用户友好名称可以是任意文本,而 *.ext 则是文件匹配过滤器和文件扩展名。该扩展名应在过滤器字符串末尾用括号括起。
"User-friendly name (*.ext)"如果您想提供多个过滤器,可以使用 ;; (两个分号) 将它们分隔开。以下是一个示例,其中包括一个“* 所有文件”过滤器。
"Portable Network Graphics Image (*.png);;Comma Separated files(*.csv);;All files (*)"接下来我们会更新示例,以将上述示例过滤器提供给 QFileDialog.getOpenFilename() 方法。
Listing 65. basic/dialogs_file_2.py
    def get_filename(self):
        filters = "Portable Network Graphics files (*.png);;CommaSeparated Values (*.csv);;All files (*)"
        print("Filters are:", filters)
        filename, selected_filter = QFileDialog.getOpenFileName(
            self,
            filter=filters,
        )
        print("Result:", filename, selected_filter)
您通常会看到
*.*用于所有文件过滤器,但在 Qt 中这不会匹配没有扩展名的文件。
您可以将过滤器写入字符串中,但这样做可能会变得有些繁琐。如果您希望在初始状态下选择特定的过滤器,则需要复制该字符串中的文本(或从中提取)。相反,我建议您将文件过滤器定义存储为字符串列表,然后在传递给对话框方法之前使用 ;; 将列表连接起来。这样做的好处是,初始过滤器可以通过索引从该列表中选择。
FILE_FILTERS = [
    "Portable Network Graphics files (*.png)",
    "Text files (*.txt)",
    "Comma Separated Values (*.csv)",
    "All files (*.*)",
]

initial_filter = FILE_FILTERS[2] # *.csv
# 构建以 ;; 分隔的过滤字符串
filters = ';;'.join(FILE_FILTERS)
我们的示例已更新为使用此方法,其中 FILE_FILTERS 在文件顶部定义,以便所有文件方法均可使用。
Listing 66. basic/dialogs_file_2b.py
import sys

from PyQt6.QtWidgets import (
    QApplication,
    QFileDialog,
    QMainWindow,
    QPushButton,
)

FILE_FILTERS = [
    "Portable Network Graphics files (*.png)",
    "Text files (*.txt)",
    "Comma Separated Values (*.csv)",
    "All files (*.*)",
]


class MainWindow(QMainWindow):
    def __init__(self):
        super().__init__()

        self.setWindowTitle("My App")

        button1 = QPushButton("Open file")
        button1.clicked.connect(self.get_filename)

        self.setCentralWidget(button1)

    def get_filename(self):
        initial_filter = FILE_FILTERS[3] # 从列表中选择一个
        filters = ";;".join(FILE_FILTERS)
        print("Filters are:", filters)
        print("Initial filter:", initial_filter)

        filename, selected_filter = QFileDialog.getOpenFileName(
            self,
            filter=filters,
            initialFilter=initial_filter,
        )
        print("Result:", filename, selected_filter)

app = QApplication(sys.argv)

window = MainWindow()
window.show()

app.exec()
配置文件对话框
现在我们已经了解了过滤器,让我们扩展我们的示例,为更多类型的文件操作添加处理程序。然后,我们将逐步介绍每个 QFileDialog 方法,以了解其他可用的配置选项。下面,我们将会添加一系列按钮,并将它们连接到文件方法槽,以处理显示不同的对话框。
Listing 67. basic/dialogs_file_3.py
import sys

from PyQt6.QtWidgets import (
    QApplication,
    QFileDialog,
    QMainWindow,
    QPushButton,
    QVBoxLayout,
    QWidget,
)

FILE_FILTERS = [
    "Portable Network Graphics files (*.png)",
    "Text files (*.txt)",
    "Comma Separated Values (*.csv)",
    "All files (*.*)",
]


class MainWindow(QMainWindow):
    def __init__(self):
        super().__init__()

        self.setWindowTitle("My App")

        layout = QVBoxLayout()

        button1 = QPushButton("Open file")
        button1.clicked.connect(self.get_filename)
        layout.addWidget(button1)

        button2 = QPushButton("Open files")
        button2.clicked.connect(self.get_filenames)
        layout.addWidget(button2)

        button3 = QPushButton("Save file")
        button3.clicked.connect(self.get_save_filename)
        layout.addWidget(button3)

        button4 = QPushButton("Select folder")
        button4.clicked.connect(self.get_folder)
        layout.addWidget(button4)

        container = QWidget()
        container.setLayout(layout)
        self.setCentralWidget(container)

    def get_filename(self):
        initial_filter = FILE_FILTERS[3] # 从列表中选择一个
        filters = ";;".join(FILE_FILTERS)
        print("Filters are:", filters)
        print("Initial filter:", initial_filter)

        filename, selected_filter = QFileDialog.getOpenFileName(
            self,
            filter=filters,
            initialFilter=initial_filter,
        )
        print("Result:", filename, selected_filter)

    def get_filenames(self):
        pass

    def get_save_filename(self):
        pass

    def get_folder(self):
        pass

app = QApplication(sys.argv)

window = MainWindow()
window.show()

app.exec()
🚀 运行它吧! 您将看到一组可用于运行文件方法的按钮——目前仅“打开文件”功能可用

图六十四:文件对话框启动器演示。
让我们依次逐一查看每个文件方法,并将它们添加到我们的示例中。
打开一个文件
要选择单个文件名以打开文件,可以使用 QFileDialog.getOpenFileName() 方法。
静态方法都接受一个父控件的父参数(通常为 self )和一个对话框标题的标题参数。它们还接受一个目录参数,该参数是对话框将打开的初始目录。标题和目录都可以是空字符串,在这种情况下,将使用默认标题,对话框将在当前文件夹中打开。
除了 caption 和 'directory' 外,该方法还接受 filter 和 initialFilter 参数来配置文件过滤器。完成后,它返回所选文件作为字符串(包含完整路径)以及当前选定的过滤器。
Listing 68. basic/dialogs_file_4.py
    def get_filename(self):
        caption = "" # 空值使用默认标题。
        initial_dir = "" # 空文件夹使用当前文件夹。
        initial_filter = FILE_FILTERS[3] # 从列表中选择一个。
        filters = ";;".join(FILE_FILTERS)
        print("Filters are:", filters)
        print("Initial filter:", initial_filter)

        filename, selected_filter = QFileDialog.getOpenFileName(
            self,
            caption=caption,
            directory=initial_dir,
            filter=filters,
            initialFilter=initial_filter,
        )
        print("Result:", filename, selected_filter)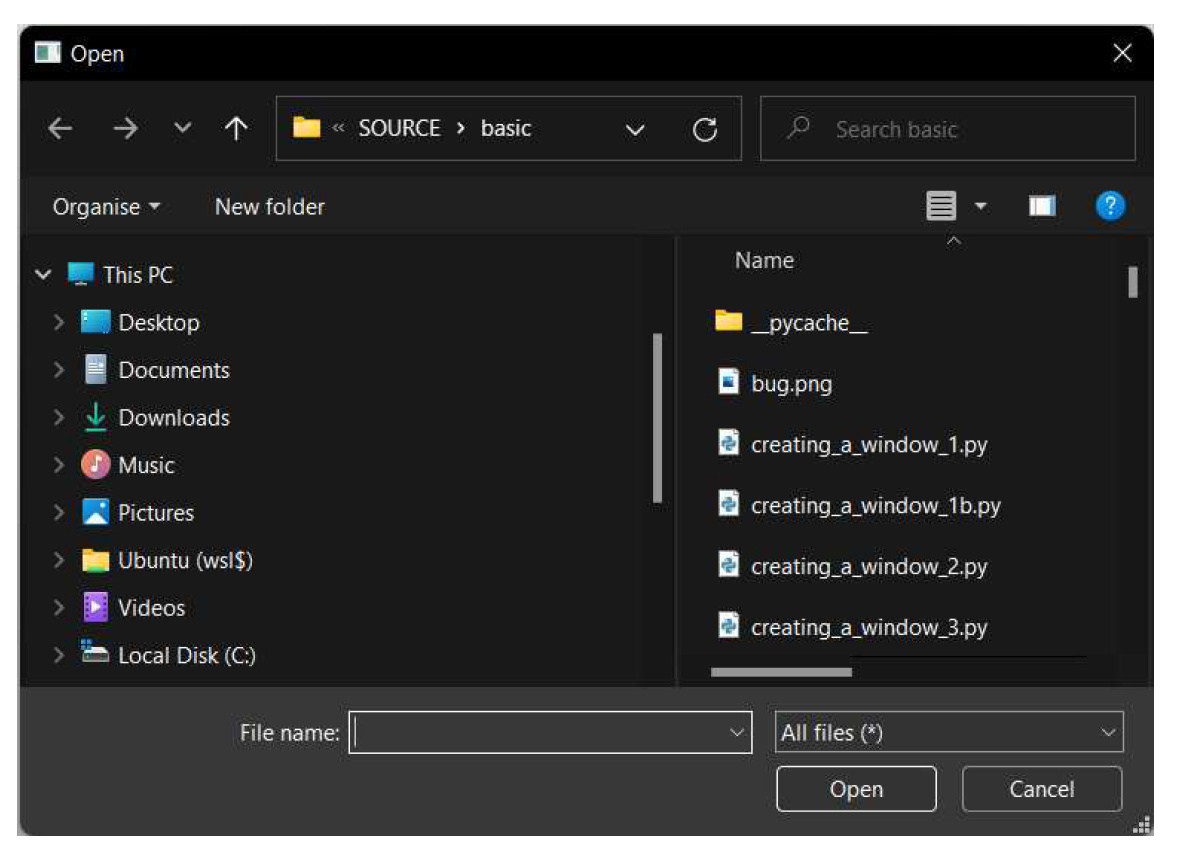
图六十五:标准的Windows打开对话框,处于深色模式。
一旦获得文件名,即可使用标准 Python 进行加载。如果对话框已关闭,文件名变量将为空字符串。
Listing 69. basic/dialogs_file_4b.py
        if filename:
            with open(filename, "r") as f:
                file_contents = f.read()
打开多个文件
有时您希望用户能够一次加载多个文件——例如将一组数据文件加载到应用程序中。QFileDialog.getOpenFileNames() 方法可实现此功能。该方法与上述单文件方法使用相同的参数,唯一区别在于它返回所选文件路径的字符串列表。
Listing 70. basic/dialogs_file_4.py
    def get_filenames(self):
        caption = "" # 空值使用默认标题。
        initial_dir = "" # 空文件夹使用当前文件夹。
        initial_filter = FILE_FILTERS[1] # 从列表中选择一个。
        filters = ";;".join(FILE_FILTERS)
        print("Filters are:", filters)
        print("Initial filter:", initial_filter)

        filename, selected_filter = QFileDialog.getOpenFileNames(
            self,
            caption=caption,
            directory=initial_dir,
            filter=filters,
            initialFilter=initial_filter,
        )
        print("Result:", filenames, selected_filter)
您可以通过遍历并加载文件名中的文件,就像在前一个示例中一样。选择单个文件仍然可行,并将返回一个包含单个条目的列表。如果在未选择文件的情况下关闭对话框,文件名将是一个空列表。
Listing 71. basic/dialogs_file_4b.py
        for filename in filenames:
            with open(filename, "r") as f:
                file_contents = f.read()
保存一个文件
要保存文件,您可以使用 QFileDialog.getSaveFileName() 方法。
Listing 72. basic/dialogs_file_4.py
    def get_save_filename(self):
        caption = "" # 空值使用默认标题。
        initial_dir = "" # 空文件夹使用当前文件夹。
        initial_filter = FILE_FILTERS[2] # 从列表中选择一个。
        filters = ";;".join(FILE_FILTERS)
        print("Filters are:", filters)
        print("Initial filter:", initial_filter)

        filename, selected_filter = QFileDialog.getSaveFileName(
            self,
            caption=caption,
            directory=initial_dir,
            filter=filters,
            initialFilter=initial_filter,
        )
        print("Result:", filename, selected_filter)
同样,您可以使用文件名变量通过标准的 Python 保存到文件。如果对话框在未选择文件的情况下关闭,文件名变量将为空字符串。如果文件已存在,它将被覆盖且现有内容会丢失。
您应始终确认用户是否确实希望覆盖文件。在下面的示例中,我们使用 os.path.exists() 函数检查文件是否存在,然后显示一个 QMessageBox 对话框,询问用户是否继续覆盖现有文件。如果用户回答“否”,则不会写入文件。如果文件不存在,或用户回答“是”,则写入文件。
Listing 73. basic/dialogs_file_4b.py
import os

       if filename:
           if os.path.exists(filename):
                # 已存在文件,请用户确认。
                write_confirmed = QMessageBox.question(
                   self,
                   "Overwrite file?",
                   f"The file {filename} exists. Are you sure youwant to overwrite it?",
                )
            else:
                # 文件不存在,始终确认
                write_confirmed = True

            if write_confirmed:
                with open(filename, "w") as f:
                    file_content = "YOUR FILE CONTENT"
                    f.write(file_content)
始终尝试考虑用户可能犯的错误——例如在保存对话框中点击了错误的文件——并给他们机会自行挽救。
选择一个文件夹
要选择一个现有文件夹,您可以使用 QFileDialog.getExistingDirectory() 方法。
folder_path = QFileDialog.getExistingDirectory(parent, caption="", directory="", options=ShowDirsOnly)默认情况下,QFileDialog.getExistingDirectory 只会显示文件夹。您可以通过传入参数来更改此设置。
还有一些静态方法可用于加载远程文件,这些方法返回
QUrl对象。这些方法包括QFileDialog.getSaveFileUrl()、QFileDialog.getOpenFileUrls()、QFileDialog.getOpenFileUrl(),以及用于文件夹的QFileDialog.getExistingDirectoryUrl()。有关详细信息,请参阅 Qt文档。
如果您希望对文件对话框的行为有更多控制权,可以创建一个 QFileDialog 实例并使用配置方法。以下是相同的文件对话框演示,但与使用上述静态方法不同,我们创建了一个 QFileDialog 实例并在启动对话框前对其进行配置。
Listing 74. basic/dialogs_file_2.py
import sys

from PyQt6.QtWidgets import (
    QApplication,
    QFileDialog,
    QLineEdit,
    QMainWindow,
    QPushButton,
    QVBoxLayout,
    QWidget,
)

FILE_FILTERS = [
    "Portable Network Graphics files (*.png)",
    "Text files (*.txt)",
    "Comma Separated Values (*.csv)",
    "All files (*.*)",
]


class MainWindow(QMainWindow):
    def __init__(self):
        super().__init__()

        self.setWindowTitle("My App")

        layout = QVBoxLayout()

        button1 = QPushButton("Open file")
        button1.clicked.connect(self.get_filename)
        layout.addWidget(button1)

        button2 = QPushButton("Open files")
        button2.clicked.connect(self.get_filenames)
        layout.addWidget(button2)

        button3 = QPushButton("Save file")
        button3.clicked.connect(self.get_save_filename)
        layout.addWidget(button3)

        button4 = QPushButton("Select folder")
        button4.clicked.connect(self.get_folder)
        layout.addWidget(button4)

        container = QWidget()
        container.setLayout(layout)
        self.setCentralWidget(container)

    def get_filename(self):
        caption = "Open file"
        initial_dir = "" # 空文件夹使用当前文件夹。
        initial_filter = FILE_FILTERS[3] # 从列表中选择一个

        dialog = QFileDialog()
        dialog.setWindowTitle(caption)
        dialog.setDirectory(initial_dir)
        dialog.setNameFilters(FILE_FILTERS)
        dialog.selectNameFilter(initial_filter)
        dialog.setFileMode(QFileDialog.FileMode.ExistingFile)

        ok = dialog.exec()
        print(
            "Result:",
            ok,
            dialog.selectedFiles(),
            dialog.selectedNameFilter(),
        )

    def get_filenames(self):
        caption = "Open files"
        initial_dir = "" # 空文件夹使用当前文件夹。
        initial_filter = FILE_FILTERS[1] # 从列表中选择一个

        dialog = QFileDialog()
        dialog.setWindowTitle(caption)
        dialog.setDirectory(initial_dir)
        dialog.setNameFilters(FILE_FILTERS)
        dialog.selectNameFilter(initial_filter)
        dialog.setFileMode(QFileDialog.FileMode.ExistingFile)

        ok = dialog.exec()
        print(
            "Result:",
            ok,
            dialog.selectedFiles(),
            dialog.selectedNameFilter(),
        )

    def get_save_filename(self):
        caption = "Save As"
        initial_dir = "" # 空文件夹使用当前文件夹。
        initial_filter = FILE_FILTERS[1] # 从列表中选择一个

        dialog = QFileDialog()
        dialog.setWindowTitle(caption)
        dialog.setDirectory(initial_dir)
        dialog.setNameFilters(FILE_FILTERS)
        dialog.selectNameFilter(initial_filter)
        dialog.setFileMode(QFileDialog.FileMode.AnyFile)

        ok = dialog.exec()
        print(
            "Result:",
            ok,
            dialog.selectedFiles(),
            dialog.selectedNameFilter(),
        )

    def get_folder(self):
        caption = "Select folder"
        initial_dir = "" # 空文件夹使用当前文件夹。

        dialog = QFileDialog()
        dialog.setWindowTitle(caption)
        dialog.setDirectory(initial_dir)
        dialog.setFileMode(QFileDialog.FileMode.Directory)

        ok = dialog.exec()
        print(
            "Result:",
            ok,
            dialog.selectedFiles(),
            dialog.selectedNameFilter(),
        )

app = QApplication(sys.argv)

window = MainWindow()
window.show()

app.exec()
🚀 运行它吧! 您将看到与之前相同的对话框启动程序,其中包含相同的按钮。
您会发现,采用这种方法时,对话框之间几乎没有区别——您只需设置适当的模式和窗口标题即可。在所有情况下,我们都通过 dialog.selectedFiles() 方法获取选中的文件,该方法返回一个列表,即使只选中了一个文件也是如此。最后,请注意,使用这种方法您可以将过滤器作为字符串列表传递给 dialog.setNameFilters(),而不是使用 ;; 连接它们,尽管如果您更喜欢这种方式的话,您仍然可以使用 dialog.setNameFilter() 以 ;; 连接的方式传递。
您可以选择任何您喜欢的方法。与之前一样,自定义的 QFileDialog 实例具有更高的可配置性(我们在这里只是略微涉及了部分内容)然而,静态方法具有非常合理的默认值,这将为您节省一些时间。
有了这些方法,您应该能够创建应用程序所需的任何对话框了!
Qt 还提供了一些不太常用的对话框,用于显示进度条(
QProgressDialog)、一次性错误消息(QErrorMessage)、选择颜色(QColorDialog)、选择字体(QFontDialog)以及显示向导以引导用户完成任务(QWizard)。有关详细信息,请参阅 Qt 文档。
用户友好的对话框
创建糟糕的对话框特别容易。从让用户陷入困惑的选项中无法脱身的对话框,到层层嵌套的无休止弹出窗口,伤害用户的方式不胜枚举。

一些糟糕的对话示例——您发现第4个地方有什么问题了吗?默认操作具有破坏性!
对话框按钮由系统标准定义。您可能从未注意到 macOS 和 Linux 上的“确定”和“取消”按钮与 Windows 上的位置相反,但您的大脑已经注意到了!

对话框按钮的排列顺序取决于平台。
如果您不遵循标准,将会让用户感到困惑并导致他们犯错。使用Qt时,您在使用内置控件时可以免费获得这种一致性。请务必使用它们!
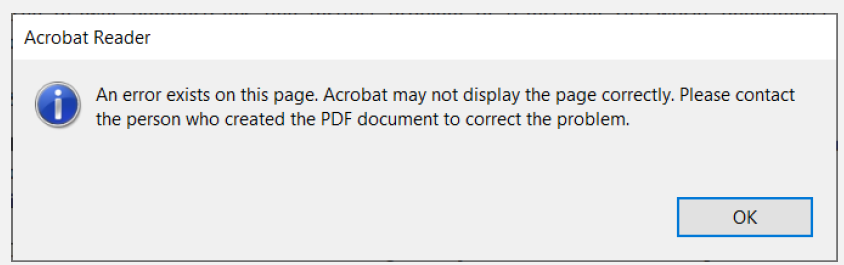
来自Adobe Acrobat Reader的真实对话框
错误对话框总是让用户感到烦躁。当您显示一个错误对话框时,您是在向用户传达坏消息。当您向某人传达坏消息时,您需要考虑它对他们的影响。
上面是Adobe Acrobat Reader中一个真实的错误对话框。请注意它如何解释存在错误、可能的后果以及潜在的解决方法。但它仍然不够完美。错误以信息对话框的形式显示,且该对话框在每页都会弹出。在文档中移动时无法抑制重复的消息。对话框文本也可进一步优化,以明确指出该错误无法恢复。
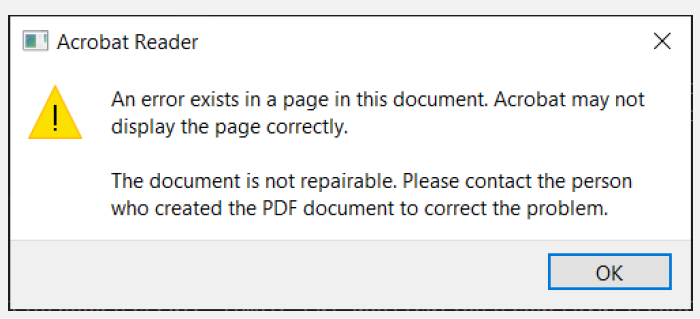
Adobe Acrobat Reader DC 对话框的改进版本
良好的错误信息应说明——
发生了什么
哪些内容受到了影响
由此产生的后果是什么
可以采取哪些措施来解决
请务必花时间确保对话框设计合理。
请务必使用真实用户测试错误信息并根据反馈进行优化。
请勿假设用户能够理解编程术语或错误信息。